HOW DID YOU USE MEDIA TECHNOLOGIES IN THE CONSTRUCTION,
RESEARCH, PLANNING AND EVALUATION STAGES?
RESEARCH, PLANNING AND EVALUATION STAGES?
Our project without a doubt heavily relied on technology, otherwise we would not have been able to create a teaser trailer. Throughout the creation of AWOL we had to use technology, from hardware like computers to software like Photoshop . These technologies aided us with practically everything from planning our trailer to editing the final production, some of the technology we used we were already familiar with which made some of the task easy to do, however some of the technologies were completely new to us and it took some time to get used to.
FROM THE BEGINNING
APPLE MAC
Our group was assigned to Mac 10, where AWOL was created. The Mac was very useful in our construction, research, planning and evaluation stage, We benefited from in built software, like iTunes, Garage Band, Keynote and many others.

|
Benefits of the Apple Mac

|
PLANNING AND RESEARCH

|
We had to have a website to show the stages of work, so we used Weebly! This very website you are looking at right now. Using weebly is relatively easy considering we used it in first year for our magazine. Weebly allowed us to be creative in the way we presented our work, and make our work look professional.
|

|

|


|
Google was our main search engine and was a good way to get reliable secondary research information like the real media text we used as inspiration for our work. We were able to look at real horror magazine, trailers and posters to help us in our creating process. We also used it to get pictures we used in our website.
|
|
WhatsApp was a very important means of communication for our group. Since we can't always meet up to discuss our project, we used WhatsApp to keep us close and communicating, we have had group meetings over it and are able to send each other pictures and videos over it, which meant if we needed to visual with our meeting we could do that without waiting till we met up physically
|

|


|
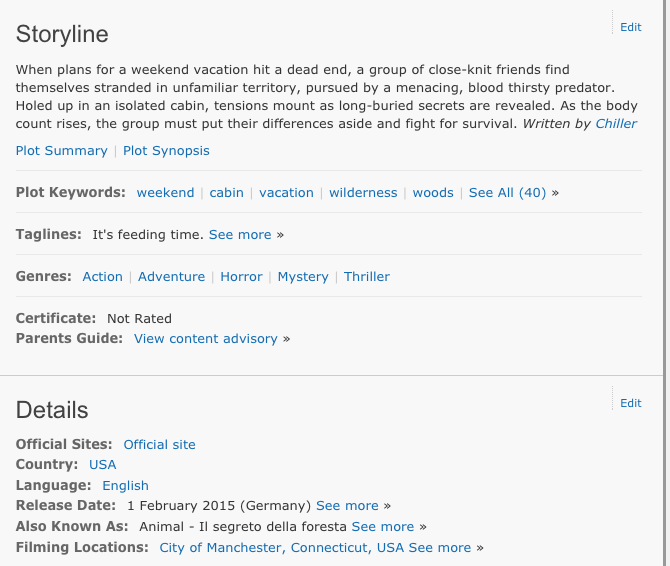
IMDb is the Internet Movie Database. It contains useful information about movies, like the release date, the movie budget, the cast, the crew and even has suggestions based on your preference. IMDb was useful to us as it provided us with information about real media texts that benefited us in creating our concept and finding similar movies to help improve our research.
|


|
Keynote and PowerPoint are pretty much the same software just on different devices. They were used when creating the concept and treatment and horror genre page and even on this page.
PowerPoint and Keynote are easy to use and allow you to be creative with your presentation, which makes it interesting and engaging to the audience as you can use pictures and link videos on it. (Some examples below) |

|

|

|
YouTube was also another very useful throughout the stages of our projects, with it we were able to watch horror trailers for inspiration for our trailer. With it we were able to watch multiple horror trailers and pick out the convention s that separated horror from other genres.
YouTube helped us with using difficult softwares we weren't familiar with, like Adobe Premier. We were able to search up how to navigate Premier and found useful videos with a step by step guide. Also we created a Greed Cinema channel to upload our own work onto YouTube and have all our videos saved in one place, which we then posted onto Weebly. It was really easy and simple to use. |

|

|
|
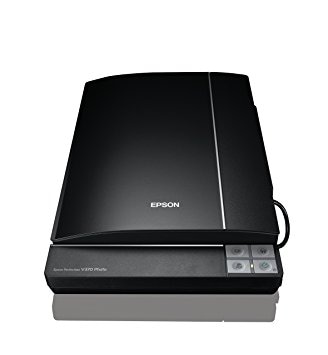
Epson scanner was used to upload our paperwork unto our website. It was useful when creating the digital drafts for our trailer and poster as the drawn draft could be uploaded unto Photoshop and worked over.
|
COMMENCING CONSTRUCTION
MAGAZINE AND POSTER
|
Photoshop is a software we are already familiar with as a group, since we used it in our first year. It was easy to navigate and straight forward to use. With photoshop were able to create:
Our logo Mood boards about the conventions and concepts of our trailer Magazine and Poster templates to help for the actual creation of the product Final products, the actual magazine and poster for our coursework Because we were already familiar with it our task were less daunting, so we were able to sort of breeze through the tasks set and our previous experience with it guided us in making a realistic magazine and poster |

|
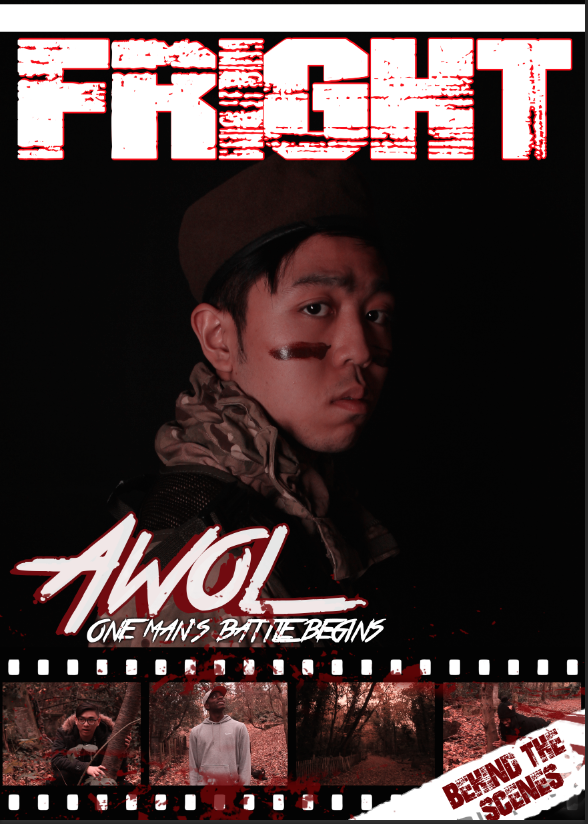
CREATING FRIGHT MAGAZINE
In order to create Fright magazine, we first had to create drawn drafts of them which Noah did quite well, similar to first year he had to think about the conventions of a magazine, like where the masthead should be, the issue number, barcode et cetera. After that a digital draft had to be created in order to get an idea of what it would like on screen, again Noah completed this task. Finally we were ready to create the final piece adding actual pictures and using our downloaded font and extra bits to make or website look realistic. This part really tested how well we could use Photoshop and if we truly learnt anything from first. Tuan took charge of the final piece and clearly, he's pretty fluent in Photoshop.
DRAWN DRAFTS

|

|
DIGITAL DRAFTS
|
|


FINAL PRODUCT

This is the original untouched main image taken by Tuan. He also added other mini images and the masthead of magazine (the font was courtesy of dafont.com)
|
Here he had added a colour overlay and downloaded a film template to add to mini images to make it look more professional along with the film title and tagline
|

He was practically finished at this stage adding the necessary context and conventions. Tuan had also adjusted the brightness and contrast of the main image as it now brighter and stands out of the darkness.
|

This the final product, which as you will notice is quite different from the former. He has added an incentive to buy the magazine and added an image overlay to change the appearance of the main image adding a more gritty effect to the magazine
|

|

|
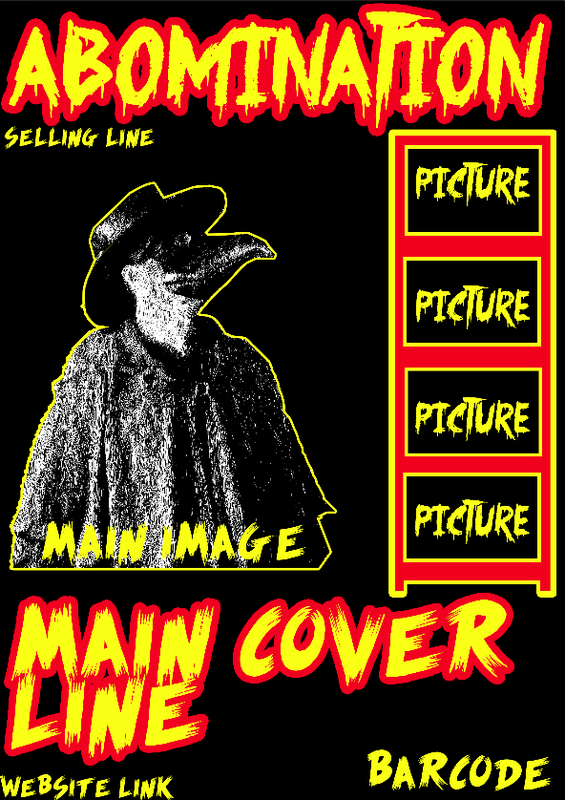
CREATING AWOL POSTER
Similar to the creation of Fright magazine, the first thing we had to do was create a drawn draft again this was done by Noah. Of course in order he had to look at real media text and get inspiration for the layout of the poster. Next he created the digital draft to help him prepare for the final product. It's quite obvious from the final piece that a lot of the layout was changed but that's because, looking at real media texts and listening to advice from our teacher helped us realise the changes will be for the best .
DRAWN DRAFT

|

|
DIGITAL DRAFT
|
|


FINAL PRODUCT

A brightness and contrast tool has been used to change the appearance of the main image making it appear darker and redder.
|

The poster is really starting together. Noah has followed the convention of a poster by adding the title near the bottom of the page and the cast on top. He even had to use Photoshop to create the little logos at the bottom of the page near the credits.
|

Still following conventions he has added a critic film rating and wards the film has 'received' to make it appear more realistic. He had to download the award reef and the star before he could use them. Just like he had to download Steel Tongs in order to create the posters credit block.
|

He has now added a background to the poster which he found online and blending it into the image by using the blending tool he has also changed the opacity of the woods image so it doesn't overshadow our main image. Plus he has used a pen tool to go over the picture which has given it some kind of glow to make it stand out even more in the dark background.
|

|

|
SOME OF PHOTOSHOP'S PHINEST (GET IT?)

|
Dafont.com was really useful in helping us create a personalised poster and magazine we were able to find fonts on there which we felt represented our product. Finding fonts on this website was very long as there were so many to chose from, however the fonts were categorised so that was a little useful. Some of the fonts we used was called 'true lies' which was used for AWOL, and 'Bad grunge' used for our magazine masthead


|
SHOOTING
In order to produce and create our magazine, poster and trailer we obviously needed cameras. For our projects we used the Canon EOS 7D and Canon EOS 600D, both camera were easy to use and provided us with clear quality pictures.

Canon EOS 7D
This camera 'Provides top level image quality and functionality without the bulk' meaning it is easy to use on the move and provides excellent quality shots
|

Canon EOS 600D
'With class-leading 18-megapixel resolution, user-friendly design, and the entire EOS family of lenses and accessories at your disposal, the EOS 600D lets nothing stand in the way of your photography'
|
PICTURES TAKEN WITH BOTH CAMERAS

|

|


|
It's quite hard to tell the difference between both cameras as the quality is uncanny. However the EOS 7D is better because it has longer battery life, so we can take more shots with it, it also has a higher fps meaning we can get more shots on it than on 600D. The 600D is a little uncomfortable to hold and has a lower battery life meaning we have to rush the scenes if the battery begins to run out. Overall they were both great cameras and got the job done!
CAMERA'S LITTLE HELPERS

|
KINO FLO LIGHTS
Kino Flo lights was a useful tool when taking the pictures for our magazine and poster. It help make to picture brighter with having to adjust anything on the camera. However we rarely used it in shooting our trailer because the art gallery was well light and the woods provided us with natural light, plus there was no electrical outlet available. Like most of the equipment we used the Kino Flo is pretty easy to use. However the outcome of your picture is determined by the position of the light |
|
Bad position of Kino Flo, created unnecessary brightness making it hard to see the subject and large shadows which we didn't want |
Good position of Kino Flo, created a clear picture picture with a nice glow on the subject |

|

|
|
SHOULDER RIG
This equipment gives the camera person more control when handling the camera, it works just as well as a stedicam, with added benefits like more flexibility and is better than just using your hands, as the rig balances the camera and reduces the risk of shaking in the shot. It is straight forward to use, just prop onto your shoulders with the camera attached and begin filming. There's nothing to it! |

|

|
TRACKING DOLLY
This another simple but extremely helpful piece of equipment to have when filming. The track allowed us to take smooth protagonist close up, as the camera just glided over the track. It is better than doing a handheld shot because there will be less shaking and just a clear and balanced shot |
|
BOOM MICS
For our project we used a small boom mic that is placed on top of the cameras. A boom mic is easy to use and has many benefits. It placed on the camera so there is no way it will be in the shot, it captures the dialogue with ease and reduces the noise that come with using a handheld mic. It is also straight forward to use, so all's well. |

|
|
|
|
Adobe Premiere
(the mother load)

|
Probably the most tasking software we've had to use this year is Adobe Premiere. It's safe to say we were complete novices when it came to this software. The final trailer was edited by Koinsola and Grace. But first to familiarise ourselves with our the software before the final editing of our trailer, we first edited our storyboard and turned it into an animatic, this was done by Koinsola. The animatics task involved using a template from an existing horror trailer and just adding your storyboard pictures over it.
|
This task was to help us understand the pace at which the trailer will take and also help us in figuring out how to use Adobe Premiere. Through this task we learnt how to use the cut tool, elongate or shorten the image time and export and import files we need. So basically we learnt the basics of premiere
SEQUENCE TIMELINE

Tool kit

|
<---- That complicated looking thing there is a sequence timeline, this means that everything, image or video imported and added to the timeline is timed so you know how long the whole piece will last for. You will find in it little tools that will prove really useful when it comes to editing. This tools will allow you cut a a file short, speed up a file and many other (little tool image provided below timeline), they are easy to use once you get the hang of it. And if you're already a proficient Photoshop user the tools will be apiece of cake as some of them a similar to Photoshop. |
PROJECT PANEL |
CANVAS |

|

|
|
The project panel contains all the files you import on to your project, this makes it easy for you to just check through the panel and grab things out that you need for you sequence timeline. You can even add your timeline to your panel. On your panel you can create captions and even view your imports on the screen above it, to be sure of the file before adding it to your timeline.
|
The canvas which is situated above the sequence timeline is there to help make editing easier for you. It allows you to get a preview of the work you've already so if you're unhappy with any of it you can find it on the timeline (via a marker that both canvas an timeline share: Just double click the marker on the canvas and it will show on the timeline) and fix saving you time and stress in the long run
|

|

|
SOUND

|
Most of sound used for animatics and trailer were already uploaded to our Macs on iTunes,that the easy part. The hard part was going through the sounds to find the ones we felt worked best with our piece. The sounds were categorized which was very useful and saved us time. For example if we were looking for a sound of someone walking on grass we'd find in the walking file.
|
|
|
|
| ||||||||||||||||
|
This is the official trailer for Smiley which we used as a template to create our animatics.
|
This is the animatics we created on premiere using the Smiley trailer as a template before we started adding our own sounds.
|
|
This is the our animatics with our own sounds added by Noah, from the sound library on iTunes and some he downloaded himself.
|
This is the final teaser trailer, where we used our own shots and added our own sounds.
|
CONCLUSION
The end is now
To conclude media technologies have been amazing at during every single stage of project, without it we wouldn't have a project, because we can't film without cameras. It was very useful to have software like Photoshop to create our poster and magazine on. Adobe Premiere no matter how stressful helped us make our trailer. Without search engines like google, it would have been hard to gain easy access to real media texts which we used for comparison. Lastly the iMac proved to be the most useful of all saving all our files allowing us to access the internet and develop on our software skills.

